Last week my class made Matariki stars for Matariki. At first we watched a video of how to make these Matariki stars. The first step was to cut a piece of cardboard into a circle and cut lines about 1.5 cm all around like a clock. Then we wrote numbers 1 to 12. We slid the first colour of wool into the first slit and took it all the way down to the opposite side. We did this until we had completed a full circle around the circle. After this we took a second colour of wool and created alternate star points gas you can see in my photo.) Eventually you get a Matariki star that looks like this and you can also add some more colors to your star and keep going until it is very colourful.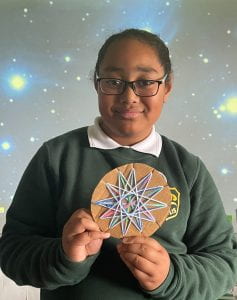
Kamusta Pio. This reminded me of when I made my matariki star. It was so much fun.I like how you explained the steps in detail.